Studio Musings

Showing posts with label creative cross-training. Show all posts

Wednesday, August 8, 2018

Summer Camp Fun (aka Cricut Mountain Make-a-thon)

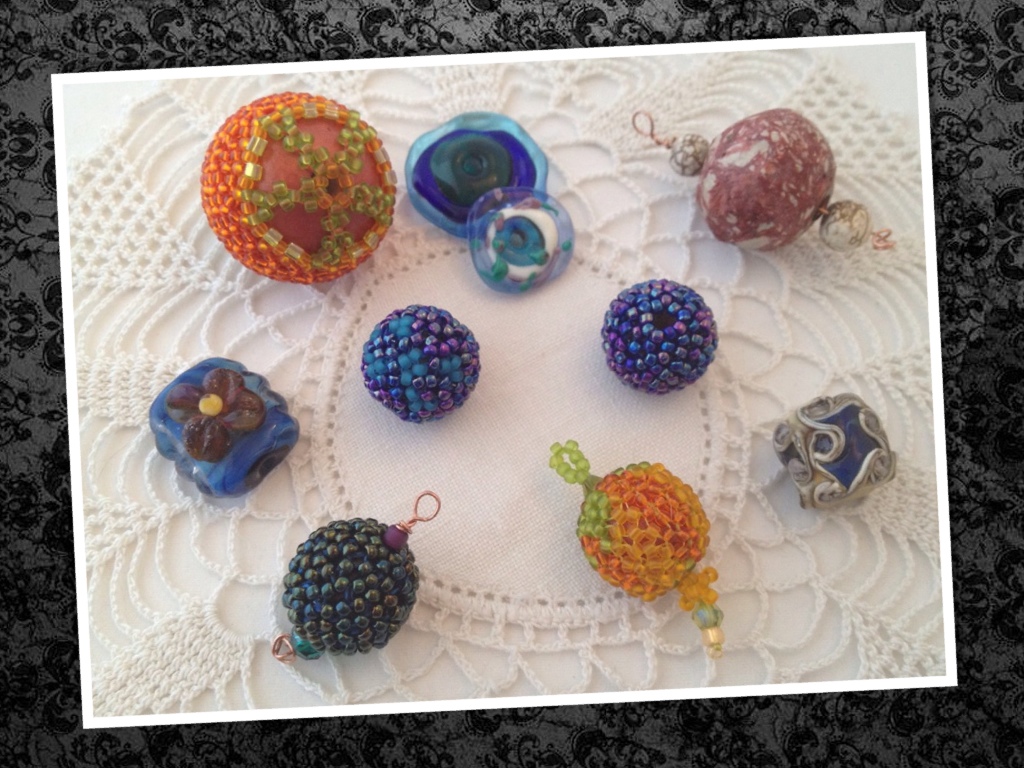
Love my new collection of pins! (the bag was mine)
Last week I went to summer camp, also known as Cricut Mountain Make-a-thon.  Three jam-packed days of creativity, new friends, and so much fun!  I've always loved summer camp - swimming, hiking, s'mores over a campfire, and my favorite - arts and crafts.  Cricut's Mountain Make-a-thon definitely delivered on the last. 

While it was announced back in May, I didn't decide to sign up until mid-July.  I really, really wanted to do something fun, because this summer has been filled with a number of not fun things, like deciding I need to let go of my studio outside the home (and figure out what to do with everything that's lived there for the past ten years!)  Signing up so late, a number of the classes were already full, but I easily managed to fill my schedule.

My biggest goal - to test drive Cricut's new Maker.  With it's expandable set of tools, it's designed to cut everything from fabric (with the rotary cutter blade) to chipboard and balsa wood (using the knife blade), as well as the normal suspects (paper, vinyl, etc.) that their Explore Air cuts so beautifully.  Over half of the classes I took were hands-on, using the Maker, and I got to watch it cut fabric, interfacing, fusible batting, felt, chipboard, paper, vinyl, iron-on and even crepe paper, as well as use the new scoring wheels to create a super-sized rosette. 

I started out with a card-making class - couldn't pass up the chance to learn a new-to-me pop-up mechanism. 
Add caption
Debbie O'Neal had designed on over-the-top card complete with pink flamingos, pineapples and a colorful toucan.  I stuck with dead-simple to make it easier to focus on how the pop-up works.  It's going to be such fun creating designs that work with this! 

We cut 4mm chipboard and patterned vinyl to create this cute banner
In "Cuts Like a Knife" I learned the knife blade doesn't try to cut all the way through thick materials in one fell swoop.  Instead, it makes multiple, very-precise passes.  It took fifteen passes to cut the 4mm chipboard shown above.  In the edge-on shot, I tried to show both the thickness of the chipboard, and how cleanly it cut.  

Sample projects from "It Cuts Like a Knife" class
I spent the first day literally running from class to class, and discovered that there was no 'passing period'.  If the schedule said Class A ends at 10:30 and Class B starts at the same time, they mean exactly that.  It meant I was a little late to several classes, because I had something like five classes all lined up, back-to-back.  Oops! Back in my hotel room that evening, I rearranged my schedule for the next day to give myself a little more breathing room. 

First up on Day Two? Audrey Fixation's Amazing Zipper class.  

Day Two - The Amazing Zippered bag
In an hour and a half, I cut out the fabrics, interfacing and fusible batting (using the cutting wheel), and FINISHED the phone case - including my first zipper in probably ten years.  Cutting, ironing, and stitching, done!  Wow. 

I finished a several projects on Day Two - I took this photo that evening as evidence
My biggest surprise of the Make-a-Thon was how much I loved their newest line of Easy-Presses

The newest Easy Press, in three sizes, from the Cricut website
Going into the conference, I thought I'd only want one if I really got into iron-on designs.  Cricut cleverly had several projects, including some universal make-and-takes, that used the different sizes of Easy Press.  We also used them in the sewing classes to press fabrics.  They are so neat!  My 10-15 year old iron had taken a fatal fall from my ironing board just before I left.  This left me in a vulnerable position, where I was way too susceptible to the lure of the bright-and-shiny.  Can you guess where this is going?  Yep, the smallest press followed me home, really.   We'll see how much I love it once I've used it a bit more at home.  At the very least, it's base design makes it much less likely to plummet from my ironing board.  :)

One of the classes I exchanged into was Lia Griffith's "Magical Crepe Paper Flowers".   I was waitlisted, but luckily a few someones didn't show up, so there was room.

Lia Griffith's crepe paper flower bouquets on the left, my bloom on the right
In just an hour, I made this Iris/Tulip hybrid (it looks more like an iris to me, but I think it's supposed to be a fancy tulip).  I could have used a little more time to blend the pan pastels, but I definitely got the picture.  This was another dangerous, dangerous class!  I'm now the proud owner of a signed copy of Lia's latest book, Crepe Paper Flowers.  I can't wait to try out some of her other designs.  Even better?  If you have a Maker, the book includes a download code to cut all of the pattern pieces. 

Breakfast time friends
Each morning started with a lovely buffet breakfast, usually followed by a general session.  This was a great time to meet others who love to create as much (or more) as I do.  Including Dewana, the admin for the Cricut Design Space Facebook Group, and a number of her friends from that group.  Such a creative group!

In each corner of the main ballroom, the Cricut Team set up themed Design-scapes for a little extra inspiration.  My favorite was the child's bedroom.  Chock full of ideas.  Love the animal appliques, and how they turned one into a stuffed animal!

Cricut Design Team's "Child's Bedroom"


Cricut Design Team's "Wine & Cheese" dinner theme

They had a selfie 'scavenger hunt' in order to earn the pins I showed earlier, hence my mug at bottom left.  And every day, we received another goodie bag, from Michaels, Joann's and Cricut! 

Conference Freebies in addition to class supplies.
Cricut also gave us all of the images and fonts used in the various classes, whether or not you actually took the class.  So I can try out Anna Griffin's scoring wheel designs at some later date.  The biggest challenge, was fitting everything into my small carry-on sized suitcase and the tote bag from above.  Especially since we received the Bright Pad as a parting gift at the end of the last day. (It's not small!)

Can you tell I had fun?  I've been home a week now, and I'm still jazzed by all the possibilities.  Just need to finish moving the studio home, and then I'll have time to create....


Monday, July 9, 2018

Finding my Way Back to Me

It's been so long since my last blog post!  As my desire to blog has slowly returned, I've debated whether I should try to revive my poor, neglected Baublicious, or whether I should simply start fresh with a whole new blog.  In the end, I decided there have been enough endings and transitions in my life this year, I'm not ready for another.

That elimination diet I mentioned in my last post, back in January?  The one that was supposed to last 30 days?  Well, I ended up having to stick with it well into April, continuing to refine and eliminate additional foods until I could find a stable spot for my body to start healing. The good news is it has worked.  My health has improved significantly in so many, many ways.  Even areas that I simply took for granted as 'the way things are', like seasonal allergies, haven't been as bad as previous years. 

The only fly in the ointment is I can't stay on my very restricted diet forever, and I'm still having significant troubles reintroducing foods. Yep, I'm still in stuck in the reintroduction phase - it's slow going. I still have bad days, when my body decides to reject the latest food reintroduction.  Thankfully, the bad days are interspersed amongst the much more frequent good ones.  The bad days help me remember just why I embarked on this journey in the first place. 

The good news is that for the first time in forever, my mind keeps turning to creative endeavors not because I feel like I 'have to' or 'ought to' do them, but because I truly want to.  At the same time, I feel like I'm relearning how to be creative.  Rebuilding my creative muscles and stamina.  Last month I focused on daily sketching.  I signed up for a 30 day "Find Your Flow" workshop with Karen Abend, and committed to drawing for at least a half hour every day through the month of June.  My biggest challenge was giving myself permission to create wonky, imperfect, and often incomplete sketches, and simply enjoy the process.  So far so good! 

This happened to coincide with an invitation from my mother-in-law to join her on an Alaskan cruise earlier this month.  So I have plenty to blog about!  I just need to retrain myself to put blogging into my routine.  For so long, it's taken all of my focus simply to accomplish the must-dos on my daily lists.  It feels amazing to have energy enough to reach out for creativity, for friendship, to find my way back to the me that makes me smile.  Makes me feel like dancing!

Thursday, October 22, 2015

Creative Cross-Training: Book Making


pulling out one of my old hobbies - book making
This past year, my beading has felt far more like 'work' rather than 'fun'.  It's the hazard all working artists face.  We go into our chosen field because we love what we're doing, but sooner or later, the 'shoulds' catch up to us, and attempt to leach the joy out of creation.  While I still have plenty of ideas, and get excited thinking about them, it's been hard to stay motivated and get started.  All the old fears including "what if it's not as good as it should be?", come climbing out of their dark corners.

Sound familiar?  At this point, I know the routine;  this always seems to happen after I complete a major milestone.  Burn-out combines with the impostor syndrome to sap my energy and drive.  I've learned to work through it, but it's still hard.  Especially when it lasts as long as this particular round.  

One of the ways I've learned to deal with this is to indulge in some creative cross-training.  Turning my hand towards something totally different for a little bit as a way to jump-start my creativity, or more importantly in this case, simply to refill the creative energy well.  This past summer, I decided to participate in a gift exchange with fellow cruisers on Septembers' transatlantic journey, and that my gift would be little handmade, travel sketchbooks.  Then I got carried away, and somehow found myself needing to make thirty of them.  Yep, 3-0, thirty books, each with handpainted paper covers and sewn signatures. 

It was only mid-July, and I had until mid-September to complete the project.  If I made a book a day, I'd be set!  But since this was supposed to be a fun little extra craft project (an addition to my regular work, not a substitution), I set myself a rule:  I couldn't work on the books between 7am and 6pm Monday-Friday, as those are my normal 'working hours'.  As an extra little challenge, I decided that I'd use a different stitch pattern for each book.  If the goal was to stretch, then I should really stretch, right?

One of my all-time favorite books on book-making
Pulling down my sadly dusty copy of 1-2-&3-Section Sewings:  Nonadhesive Binding Volume II by Keith Smith, I set to work.  If you have ever had an interest in bookbinding, you want this book!  It's not one of those 'sexy' books with lots of color photos of other artists' creations - I don't think there's a single color photo in the entire book.  But if you want detailed diagrams and instructions for more sewn bindings than you can easily count, then this is the book for you.  I'd forgotten just how much I love this book!

Bookmaking doesn't require a lot in the way of tools:  an awl or large needle for punching holes, something to cut your papers to size, a bonefolder for creasing the pages, and a large-eyed needle for the sewing.  Everything else is just extra, or ways to make things easier.


scoring the spine with my bonefolder before folding the cover

stitching a section - the needle is so BIG!

continuing to stitch

Since the books were for a cruise, I went with 'oceany' colors for the covers and had a great time playing with acrylic paints using my collection of brushes, scrapers, sponges, even finger painting.  I made a complete mess of my studio, and it was totally worth it!  For the interior sections, I sacrificed a couple of blank sketchbooks, cutting and folding the pages to size.  For the stitching, I used cotton rug-warp leftover from my long-ago weaving days.  (A side goal of this project was to use up 'stuff' from my collections).

I sewed this one onto 'tapes' so show the ridged design of the cover
 A couple of my painted pages had these raised designs that I didn't want to hide underneath my stitching, so I decided to sew the interior sections onto paper 'tapes' that I then wove into the cover.  I felt particularly clever, figuring these out.
Thirty finished travel sketchbooks

The first several books; everything felt really awkward.  I had to really think about each step to make sure I did it right.  With each book it got a little easier, and before long, I found myself riffing off themes.  One stitching pattern would inspire the next.  And a week before my deadline, I had a stack of thirty little book (thirty-one actually, as I made an extra for another friend).

Did it help my issues with beading?  I fear the jury's still out.  But it was definitely fun; doing something crafty purely for play.   For the reasons I started crafting in the first place, way back when. 

Have you indulged in any creative cross training lately?  I'd love to hear about it! 

Friday, May 29, 2015

Book Review: Creativity Inc.

I've been doing a bit more reading lately, and have been working my way through Creativity Inc. by Ed Catmul, president of Pixar Animation and Disney Animation.   My husband picked up the book before Christmas, and it's been floating around the house ever since.  While the book focuses on the lessons Catmul (and Pixar) have learned about fostering creativity in a large, corporate environment, I found many parallels to my personal experiences as a solo artist.  His candid look into Pixar's creative process is both refreshing and thought-provoking.  I found myself alternating between "YES! Exactly" and "Huh! I hadn't thought of that" as I read.  My copy looks like a ticker-tape parade with all its little post-it flags pointing to passages that struck me. 

Through the book, Catmul reminds the reader that creativity is a process, and there WILL be lumps and bumps along the way.  Creation is a messy process, and most projects start out ugly. He stresses that understanding this, and protecting the 'ugly baby' is important to allow for it to potentially grow into something beautiful.   He also reminds us that starting on a project is a journey into the unknown.   That at the beginning "There is no movie.  We are making decisions, one by one, to create it".  Sound familiar?  The parallels to any creative endeavor are unmistakable. 

In his introduction, Catmul states "The making of Toy Story - the first feature film to be animated entirely on a computer - had required every ounce of our tenacity, artistry, technical wizardry, and endurance.  The hundred or so men and women who produced it had weathered countless ups and downs as well as the ever-present, hair-raising knowledge that or survival depended on this 80-minute experiment.  For five straight years we'd fought to do Toy Story our way." 

As solo artists, our art can make the same demands - drawing on our tenacity, endurance and technical skills, as well as our creativity - without the support network of a larger creative environment.  We have complete creative control, but often have little in the way of back-up or support.  The book reminded me of the importance of establishing a personal a creative support network.  

Creativity Inc. stresses that an atmosphere of fear is anathema to a truly creative environment.  Mistakes will happen.  Some big, some little.  Fear of the repercussions from those mistakes cripples the creative flow.  Accountability is important.  But so is an understanding that mistakes happen, and a willingness to think outside the box not only in creation, but in response to the unexpected of the less pleasant sort.

A safe environment is crucial to developing one's vision, as is constructive criticism. Constructive being the key word hear.  Catmul devotes an entire chapter to "Honesty and Candor", focusing on Pixar's Braintrust, which meets several times a year to assess each movie they're making.  Introducing this chapter, Catmul states "People who take on complicated creative projects become lost at some point in the process. It is the nature of things - in order to create, you must internalize and almost become the project for a while, and that near-fusing with the project is an essential part of its emergence.  But it is also confusing."

His anecdotes from Braintrust meetings provide beautiful examples of the power of constructive criticism.   Criticism can be difficult for me, no matter which 'side of the table' I happen to be on.  It's difficult for most of us, I think.  Reading through their process gave me powerful insight and examples of how truly constructive criticism can be given and received, and how it can work to improve a project.  Lot's of food for thought.

Other powerful concepts he explores through the lens of his time with Pixar and later Disney Animation include The Hidden, looking at the creative process of going from the unknown to the known; The Power of Limits, how boundaries help us to create; and Post Mortems, looking at what we've done to see what worked, what didn't and what could be done better, then using that information to add to personal and corporate knowledge.  This last resonated with me as what I've been trying to do with my Lessons Learned blog series.  The series looks back at the past year, solidifying what I've learned in a series of essays, then sharing that knowledge with my Internet 'braintrust'.

I could go on; did I mention how heavily I bookmarked my copy?  But I'll end this here:  Creativity Inc would be a great commuter book - it can be easily picked up and put down, while providing a veritable feast for anyone interested in thinking about how they relate to their creative process, no matter the setting. 

Have you read Creativity Inc?  I'd love to hear what stuck you most, what you took away, where it made you think, where it made you exclaim "exactly" to the empty air, at the risk of startling those around you. 

Tuesday, November 20, 2012

50,028 Words and the Night of Writing Dangerously

Back in early September, I made all sorts of grandiose plans for November.  Here in November, I've been scrambling to keep up.

One of those plans I made involved Nanowrimo.  As you may know, November is National Novel Writing Month, and the folks over at Nanowrimo challenge each and every one of you to write a novel over the 30 days of November.   

I find myself looking forward to Nanowrimo eleven months out of the year.  Nanowrimo.org is hands-down the best support network for aspiring writers I have ever found.  For thirty days, they provide every encouragement to simply write.  Pen to paper, fingers to keyboard, internal editor silenced – with duct tape if necessary – letting the words flow.

This is my fourth year participating.  While the goal for Nanorwrimo is 50,000 words in 30 days, this year I decided to up my personal ante.  My goal was and is to actually FINISH my story this time around.  I will not feel I have won if my characters don’t make it to their own finish line, whatever form that might take.  And so I decided to take drastic measures. 

The collage for my fundraising page
That's where the Night of Writing Dangerously comes into my story.  The wonderful folks who sponsor Nanowrimo host a gala fundraiser event in San Francisco every year during November.  That's what I want to do, I thought to myself.  If I could reach 50,000 words before I left that ballroom, not only would I get to ring the winners’ bell to the acclaim of my peers, but I'd also give my characters twelve additional days to make their way through whatever my story has thrown at them before we’re all dumped into the cold, cruel, Nanowrimo-less world of December. 

So I put together my fundraising page and contacted some of my nearest and dearest and raised enough to attend and to drag my amazing husband along with me.  And I bought our plane tickets. 


Uh, oh!  Problems ahead
Fast forward to November 10.  It's just over one week until the Night of Writing Dangerously, and I'd managed to write exactly 8,709 words.  That meant I was 7,907 words behind the recommended pace to finish by November 30th, forget about November 18th.  Ouch!  I wasn't sure I could catch up by then, let alone by by November 18th.  I nearly threw in the towel. 

But my mom, mother-in-law, sister, aunt and best friends had all pledged.  I didn't want to go back to them and say, well I tried, but I gave up.  Even if they'd understand.  I wanted to at least put in a good showing.  More, I wanted to have something awesome to share.  So I decided to give it my all.

So I wrote, and I wrote, cramming writing into every little bit of time I could squeeze from my schedule.  By the time I arrived in San Fransisco around midnight Friday night/Saturday morning, my word count stood at 25,659.  I had written just shy of 4,000 words that day; one of my best ever single-day counts in four years of participation.  I was still behind, but I figured I could at least catch up with the recommended daily word count before the end of the weekend.  And I hadn't given up!

what I saw of San Francisco
Then something miraculous began to happen.  In between short jaunts out to see snippets of the city, I continued writing and my story came alive!  By Saturday evening, I'd increased my word count to 34,096.  I wrote another 2,000 words before joining other Nanowrimos for breakfast at a local diner on Sunday.  By the time we had to dress for the event, my word count stood at 42,015.

 But I still had nearly 8,000 words to go, and only five hours during which to write if I wanted to "win" that night. 

The way the night works is from 4-5pm there's cocktail hour, with an open bar.  Joe and I showed up late, because more than one drink and my literary hopes would have certainly been dashed for the night.  At 5pm, doors to the ballroom itself opened and everyone scurried in to find their seats.

The Julia Morgan ballroom turned writers' haven
It was the funniest thing to see, everyone in their Noir themed gala finery, sitting down and whipping out their laptops.  Everyone else at our table were from the local area and knew eachother, and none of them were trying to go for the bell.  But they were very encouraging when they found out I was, and how far I still had to go.  I'd barely sat down before the bell rang for the first time and everyone burst into applause. It was Chris, one of the writers I'd met at breakfast that morning.  He'd been at 47,000+ words at that time. 

There were speeches and word sprints (where you try to write as fast as you can for a specific period of time) and raffle drawings and all sorts of other fun and interesting things and I can't tell you about any of them; I was trying to focus so hard on writing.  I did help myself to the candy bar, and spent the evening hopped up on cinnamon jelly beans, which seemed to work even better than chocolate to my amazement.  At some point, Joe went out to the buffet and brought back dinner for me.  Later in the evening he delivered a German chocolate cupcake, and at 10pm, a freshly baked chocolate chip cookie and milk.  And still I wrote (do you see a theme here?)

At 10:32pm, less than half an hour left before the evening ended, I checked my word count once again. There were the numbers I'd been hoping for: 50,028.  For a moment I simply stared at the screen.  Then I started to vibrate.  Then Joe asked me what was wrong.  I couldn't speak, so I pointed, not quite believing what it said.  He looked at my screen, grabbed my hand and literally dragged me to the front of the room.  There, a very kind woman put together my crown. Where else do fully grown adults wander around proudly wearing paper crowns?  Then I got to ring the bell.  It was large, and my hands were so numb from all the typing I had to hold it with both hands.  And the room applauded. 

Some of my writing from last night is truthfully quite awful, I am sure.  I haven't even opened my document to look at it since Sunday.  Tomorrow morning, I think, is soon enough.  To reach my word count, I'd turned the automatic spell check off, so I wouldn't be distracted by the red corrections.  I expect my entire screen to bleed red when I turn spell check back on. 

But the amazing thing is, I truly like my story!  It's ungainly, and awkward and needs a huge amount of revision, but I'm more than two thirds of the way through the plot and it's fun!  I have never made it so far into the plot in any of my other previous novels.  And now I have another twelve days (ten now as I took the past two days off) to finish the first, horribly rough draft of Jane's, my 13 year old protagonist's, story. 

I'm still stunned that I actually did it!  On Sunday I wrote 15,932 words.  To give you something to compare it to that's roughly equivalent to about 59 pages in a trade paperback.  Even today I'm still stunned and walking on air every time I think about it.  I did something I truly thought couldn't be done.  I thought I'd lost my opportunity when my word count slipped so low last week.


If you're curious about my story, you can check out the plot synopsis I wrote on November 1st on my Nanowrimo page.  The story has definitely morphed since then, but that's where it started.

Thursday, November 1, 2012

November is National Novel Writing Month

It's Nanowrimo time - National Novel Writing Month.  If you've ever thought about trying your hand at writing a novel, November's the time to do it.

The folks over at the Office of Letters and Light make it just about as easy as it's ever going to be.  You still need to put pen to paper (or fingers to keyboard), but they provide the tools, pep talks and encouragement that makes all the difference.

I think of it as my annual cross-training exercise.  For the next month I'll spend my free-time delving into an entirely different artistic medium.  World building.  Story telling.  Learning and possibly even honing my craft of writing. 

The challenge is to reach 50,000 words before the clock ticks over to December 1st.  That translates to 1,667 words per day for 30 days.  Since this is my fourth year participating, I decided to up my personal ante.  My goal is to not only reach 50,000 words, but to complete the first, totally rough draft of my story.  Start to finish.  I've never actually completed a story, so that would be something entirely new for me.

Of course, I'm not off to the best of starts - too bad none of the characters in my upcoming novel have hacking coughs; I've got great source material. :)


Anyone up for joining me?

Monday, September 17, 2012

Me, Myself and I - Monochromatic Color Combinations

Continuing in my design series, today I'm thinking about monochromatic color combinations.  Designing around a single color.  The single color works as a strong Unifying element, but since we're only using one color, Contrast has to come from somewhere else. 

Ocean Currents, freeform peyote bracelet with color palette
Ocean Currents, freeform peyote bracelet - blue, blue and more blue
Truth is, I don't work with monochromatic designs every often.   When I do, I tend to make liberal use of Value such as my in  Ocean Currents series. 

Here, I shade from bright white to deep blues. 

I'm also using Undertones to provide additional contrast - with both warm and cool blues. But I've stuck with relatively pure, intense versions of each hue. 


Leopard Jasper, freeform peyote choker with color paletteIn my Leopard Jasper choker, I shade from a light cream, through dark chocolate, ending on the other end of the value scale at black.

Brown is more often considered a neutral, rather than a 'color' in and of its own right.  That said, there's no reason why you can't use it as the focus of a monochromatic composition. 

You just have to find interesting enough browns.  I combined warm, rich browns with more neutral antique bronze beads (which worked well with the antique bronze button). 


Lariat by Malin de Konig
Adding Neutrals for Contrast

Malin de Konig graciously allowed me to use the picture at left of her lariat.  

In this clean, elegant design, Malin combines a single shade of red with a warm, rich neutral brown and antique brass. I love how it allows the red to sing and take center stage. 

Check out Malin's blog post to see additional pictures.


Additional Resources
Looking for other samples of monochromatic compositions, I put together a Pinterest board, aptly named Monochromatic Jewelry Designs, using a number of the pieces from Sally Russick's One Crayon Color challenge from earlier this year. 

Sunday, September 16, 2012

Time to Share the Love - of Art Beads!

Dithering.  That's what I've found myself doing this week.  In my spare moments I'd pull out the tray displaying the Art Bead Love chain and look through all the beads.  Every time I looked, I found something new I hadn't seen before.  And each time my decisions as to what to take and what to add changed.  

How to choose?  That became the question of the week.  Followed immediately by what to add?  There were no samples of seed beading on the chain, so I felt honor bound to uphold our collective Seedbeaders' honor and add some beaded beads.  But I didn't want to overwhelm the chain, either.  I tried to figure out how to turn my flowers into beads that non-seedbeaders could easily use (the key here being easily) and my brain just wasn't functioning sufficiently this week, so no go there.

What did I decide upon?


 Here's what I ended up taking:

Taken from the Art Bead chain


Just added to my stash! 
Clockwise from top:  two gorgeous polymer clay pendants by Moobie Grace, glass swirl disks by Heather at HMB Studios,  a couple of lampworked focals that spoke to me, including Pam Ferrari's lampworked bead that reminds me of poppies and two little green sugar beads by Sue of Suebeads, a porcelain leaf by UniqueButtons, and in the photo above, a little bronze acorn by (I think) Kelli Pope.

I spent a fair bit of time looking through posts from the previous chain holders to track down the origins of these different beads, and updated all of the links below so that they lead directly to the Art Bead Tour posts on each blog so you can more easily track its progression.

And here's what I added:


I included my most recent my Corset bead, playing with fall color schemes, and several smaller beaded beads.  The small orange beaded bead at right is supposed to be a pumpkin.  What do you think?  Up top are two of my very own lampworked disks and top right is a paper clay bead I made with a copper tube rivet for the bead hole.  And left and right there are two lampworked beads by JulsBeads to round things out.

two beads by JulsBeads


Soon, it may be your turn for a visit, because it's time to find the next stop on the tour.   I will be doing a drawing this coming Friday, September 21st.  So leave a comment here and spread the word on FB, your blog, twitter and friends.

To recap:
 The Art Bead Love Tour is an ongoing project to spread the love of handmade to new and exciting places.  It's a way to reach people who may have never stumbled upon your blog on their own, and give them a chance to share the love of handmade.  A chain was chosen to link beads as a symbol of how this project links us all together ~ in our unity to stand behind handmade.
The winner of the chain will be allowed to take up to 30 beads from this chain. They will then replace each bead they took with another handmade bead, charm or pendant of equal Quality.
(SO  Remember-----You're NOT winning the ENTIRE CHAIN---Just a chance to take some beads from it.)

PLEASE READ THE INSTRUCTIONS BELOW
I know there's a lot to read, but it's really important!!!
It is so important that the quality of the beads be maintained, so we can keep the Art Bead Love Tour alive.  We want to share consistent quality with the next winner.  If you make your own handmade beads or components, it's a great way to get your beads into the world for people to try them out, or, if you hoard collect art beads it's a great way to share your collection and get some new additions as well.
(Art Beads should be handmade by an artist, and not mass produced, such as Hill Tribe Silver beads or others like them.)
Remember, the focus is on creating handmade with handmade and beads/components taken should be replaced with beads/components that are made by an indivdual artist not an organization.
Here's where the chain has been:
Your name here            


Here's how it works:
(Please read the entire post before entering.)
1. The winner of the chain will be allowed to take up to 30 beads from this chain.  They will then replace each bead they took with another handmade bead, charm or pendant of equal quality.
2. The winner will post pictures of what was taken and what was added, in order to keep an account of the chain's progress and to keep our followers drooling.  Please be sure to give credit to the bead artists as well (if you know them). 
3. The winner will then have a giveaway, just like this one,to keep passing the chain on and on.  Rules can be copied and pasted from here.
4. When you repost your giveaway (remember you can copy and paste from here)-a list should be added to show where the chain has gone, with links to each previous blog.Ultimately, this will end up a very long list!
5. Chain must be shipped to its new home via Priority Small Flat Rate box with delivery confirmation. Please package it carefully.
6. There will be a button on the Love My Art Jewelry website that links to the current blog and giveaway-so if you have the chain, it will link to your blog, that way our followers can have another chance to win it.
7. You MUST exchange your beads and have your giveaway completed within two weeks of receiving the chain.
(Please, please, please, if you can not adhere to the above rules, do not enter the giveaway at this time.  It will go on and on and you can always enter at a later date.) There will be a button on the side bar of our blog so that you can track where the chain currently is.
Here's How to Enter:
1. You must have an active blog to enter.
2.  Leave a comment below (make sure your email is linked to your blog or leave it in the comment.  Entries without emails will not qualify)
3. Share on Facebook, Twitter or your blog for extra chances to win. Leave a comment for each way you share, with a link if possible.
4. Winner will pay shipping and will be billed through Paypal-small priority flat rate box with delivery confirmation, $6.00.
5. Open only to our readers in the United States-due to problems with tracking and shipping overseas (sorry).

I will draw a winner on Friday, September 21st. 

Monday, September 3, 2012

The Color Wheel - One Big, Happy Family

Basic twelve-step Color Wheel

Everyone's seen at least one Color Wheel in their time, likely you've seen a half dozen or so.  Most have a lovely rainbow of colors like the one above.  We have:
  • The primary colors: red, yellow, blue.  
  • The secondary colors: orange, green and purple/violet.  
  • Then there are the tertiary colors, sandwiched between the primaries and secondaries: red-orange, yellow-orange, yellow-green, blue-green, blue-violet, red-violet. 
You know the drill.

However, the Color Wheel itself isn't the purpose of the exercise.  Rather, it's simply a tool to help us better understand the Relationships between the various colors on the wheel.  Because all the colors  on a particular wheel are defined by their relationships, you could say that they are one great big color family, bound by a number of familial traits.

A particular color wheel, familial traits, you ask?  Yep!

The colors are linked by the traits we looked at in earlier posts  - Undertones, Value, Intensity and Color Temperature. 

This means that you can play with varying these traits uniformally around the color wheel to study and develop alternate Color Families.  The key is to change them uniformly while obeying a few simple rules, so that the color relationships always remain the same.

For instance, yellow is always the lightest color and violet the darkest in terms of value on any given color wheel.  So if you decide to create a color wheel of pastels, you'd need to keep this in mind.  If violet somehow ended up lighter than the yellow, it simply wouldn't look right for that color wheel.

Three Rules (or Strong Suggestions) for Color Wheels:

1) Value: As noted above, purple is always darkest (has the lowest value), while yellow is always lightest.  Also, the red and green should have approximately the same relative values.

2) Color Temperature: Orange is always the hottest color in any particular color wheel.  Blue is always the coolest.  Again, if you create a color wheel that breaks this rule, it simply won't look right.

3) Intensity: All of the colors in the wheel should have approximately the same relative intensity.

In the traditional color wheel pictured at the start of this post, all of the colors are fully intense versions of their base colors.

my stab at an Earthtoned Color Wheel
But you could easily create alternate color wheels.  For instance:

If you wanted to make a color wheel of Earth Tones, you'd likely want to look at less intense, warmer versions of each of the colors.  You might or might not mess with the values.

In the color wheel of pastels I mentioned earlier, you would lighten (raise) the value of each of color, while making sure the value relationships between the different colors remain constant. Because, of course, constancy is essential to any good relationship!

You could even make a color wheel of neon colors, were you so inclined.  So long as you work within the basic relationship rules, you're good to go to build a spiffy new, custom-made color wheel.  


And since I'd love to see more participation with this series, I'll issue a challenge.  If you put together your own unique color wheel in any medium (beads, paint, paint chips, yarn, etc), name it, photograph it and either email it to me or post it on my Facebook page by September 11th (my anniversary) I'll enter you in a drawing to win the beaded bead pendant from my most recent Bead Soup.  I'd love to hear from you!

Monday, August 27, 2012

Vocabulary Review - The Elements of Design so Far

Right now I'm running a series covering the elements of design, introducing a new element every Monday.  Well, with the Bead Soup Reveal and Blog Hop this past weekend, I'm a little behind.   I thought I'd do a vocab review this week, then start in again fresh next Monday.  Figured it would work well for anyone just joining in to!

I also went hunting for additional links for each of the topics.

Value and Contrast

Value - the quality(ies) of lightness or darkness in a particular object or composition.

Contrast - how the different values in a composition work together.

Read the full post.

Additional Links: 
Inside Out Style takes a fun look at value and contrast using the coloring of a number of actresses for comparison.  The post also has a nice value scale photo in black & white and three colors. 

The design notes for Jim Saw's Art 104: Design and Composition class at Palomar College.  It's written as notes for a college class - heavy on information, but with fewer pictures.  Great if you want to really drill into the subject.  Also has a nice section on value and contrast as it relates to photography.


Hue and Intensity

Hue refers to the specific name of a particular shade of a color.  For instance Peacock blue versus Sky Blue.

Intensity allows us to look at the relative clarity of a particular Hue in reference to its base primary color.

Read the full post.


Additional Links:
The Color Cube has an in-depth look at color.  They use the terms "Chroma" and "Saturation" to look at what I term "Intensity".

Colors by Hue.  Microsoft put this list together for web designers, but it's a great reference for anyone studying color.   


Color Temperature and Undertones

Color Temperature - the inherent warmth or coolness of a particular color (especially in relation to its place on the color wheel).

Undertones - temperature variations within the same color family.  

Read the full post.


Additional Links:
There are no pictures, but Kate Smith at Sensational Color provides a a great explanation of undertones.

Again no pictures, but Exterior House Paint Colors goes into great detail about the relative effects of undertones on your overall composition.

Maria Killam has written an entire series on undertones.  Her focus is more interior design, but still useful.  And it has pictures!


So, there's my vocabulary recap.  Hope you have a chance to look at the original posts if you didn't catch them earlier.

And if you have links you think are particularly useful for any of these topics, please share - I'd love to put together a link library

And next Monday, we'll start looking at the color wheel. 

Monday, August 20, 2012

Hot, Hot, Hot or Not, Not, Not

Welcome back to my ongoing series on the elements of design.  Today, I'm continuing to look at color - focusing on Color Temperature and Undertones.

Color Temperatures working around the color wheel
Sunny yellows, red hot, cool blue - every color has an associated Color Temperature.

Working around the color wheel, those in the red to yellow range are warm.  While the blues, greens and purples are generally regarded as cool colors.  Seems simple enough, right?

Well, it gets a little more complicated than that, unfortunately.


The Color Temperatures on the Cusps Fluctuate.

That's right - red-violet and yellow-green are sometimes warm and sometimes cool.  Because they're stuck halfway between the warm and cool colors, they don't really know which family they belong to and shift their apparent color temperature dramatically based upon who they're paired up with.

Just to be ornery, they'll tend to take the opposite Color Temperature from the majority.  Kind of like reverse camouflage.

So, if they're paired with warm colors - lots of reds, oranges and yellows, they'll seem cool.  Snuggled in with cool blues, greens and violets, they suddenly turn up warm.  

Check out the lime green beads in my samples at right - they're the same in both photographs.


Then there are Undertones.  Here's where we get into cool and warm hues of the same color family.   

Looking at the swatches, which red would you describe as warm? cool?
Varying the undertones can create Temperature differences even within the same color family, such as the red sampler above.   Brick Red is quite warm, with strong orange undertones, while Alizarin Crimson is a cool red with strong blue undertones.

This is one way to increase interest in monochromatic compositions.  Undertones can also explain why different hues of the same color simply don't seem to go together. 

This week, take a look at some of your bead stash and try to identify the undertones of the various hues - do they tend to be warm, cool or evenly mixed?