Studio Musings

Showing posts with label beading instructions. Show all posts

Thursday, September 10, 2015

Signs of Fall - Beaded Acorns

my 'acorns' look right at home with their forest counterparts
The weather here in Seattle is cooling fast; the dog days of summer are gone and we're quickly heading into fall with a week's worth of rain.  The leaves haven't started turning yet, but acorns are falling everywhere I look.

Walking home last week with a pocket full of acorns, I decided to pull out my beaded acorn earrings tutorial.  Never fully satisfied, I reworked things, adding several new diagrams and brand new photos.  The tutorial's now up on my Etsy store.


I lied - one single branch on the tree outside my front door has turned!

Happy Autumn! 

Monday, December 9, 2013

Let it Snow Beaded Snowflakes

Snowflake by Helen L. - this one reminds me of a Celtic knot
We had a great time at Fusion Beads this past Saturday working on Snowflakes and Stars.  Here are a few pictures from the class, spruced up for the holidays. 

Three Snowflakes by Vala R - she planned to finish them up later
a lovely Snowflake by Kelli J.

Two colorful stars by Sam S.

Teaching the class, several of my students had the same issues knowing when to add the bugle bead finials, and several people wanted diagrams for my newer snowflake combos. 

It got me thinking, and I spent the day putting together an four-page addendum to my Snowflakes and Stars tutorial.  The update is available for immediate download as an extra file when you purchase my PDF pattern and I'll include the download code with any new kit sales, too.   I've also sent Etsy convos to everyone who's purchased a snowflake pattern or kit within the past year.  So check your inbox if that's you.  If you purchased your copy more than a year ago, email me (or leave a comment) with your Etsy username and I'll send you the update code as well.  One of those little extra things I can do for my blog readers. 

Oh, and the frames are from the holiday version of an iPhone app called Postage, but it doesn't seem to be available in the App store anymore. 

Wednesday, May 1, 2013

2013 Seedbeaders' Schedule

I started working on this post back in December, but somehow it keeps getting lodged in my Drafts folder.  Likely because I'd hoped to get photos of -ALL- the project samples first.   Well, now we're a third of the way through the year, Seedbeader's was just this past Sunday and I think it's about time I shared what all is coming up over the next few months.  

As a reminder, we meet at the Maplewood Rock & Gem Club in Edmonds, WA and guests are always welcome. Learn a new skill, bring your own project(s) or even just come and hang out, the choice is yours.  So if you happen to be in the area on the fourth Sunday of the month....

my Kongo-gumi on the go
Kumihimo and Kongo-gumi

This month, Shelly Gillmann shared a spectacular lesson in Kumihimo.  Besides making up nearly fifty kits with cording, beads and Kumihimo discs, Shelly had so many wonderful samples (of which I just realized I didn't get any pictures), fantastic hands-on demos and lectures accompanied by detailed notes which included a link list, which she said I could share with y'all.  Thank you so much Shelly for putting this together!

This is a technique I've meant to check out for a while, so I was thrilled.  My disc has become my travel companion the past couple of days - I get some really fun looks when I work with it on the bus. 


Upcoming Meetings
Embellished Cuff by Marla Baer-Peckham, photograph by Karen Williams
Embellished Cuff by Marla Baer-Peckham
5/19/13 Embellished Peyote Cuff
Marla Baer-Peckham
[scheduled on 3rd Sunday to avoid conflict with following Memorial Weekend]


6/23/13 Zulu Square Tube (no photo available)
Ann Wilkinson

Jellyfish Pendant by Jennifer Porter
7/28/13 Jellyfish Pendant
Jennifer Porter


Square Stitch Bracelets by Donna Galstad
8/25/13 Square Stitch Bracelet
Donna Galstad


Slider Bead by Julie Dubois, photograph by Karen Williams
Slider Bead by Julie Dubois
9/22/13 Slider Bead
Julie Dubois


10/20/13    Flat Spiral (no photo available)
Shirley Pauls
[scheduled on 3rd Sunday to avoid conflict with following NWBS Retreat weekend]


12/8/13 Holiday/Planning (2nd weekend of December)
                        decide following year's programs, gift exchange, challenge reveal, bead swap game


1/26/14 Peyote & Crystal Row Bracelet (no photo available)
Ellen Lambright

Snowflake Pendant by Julie Dubois, photograph by Karen Williams
Snowflake Pendant by Julie Dubois
2/23/14 Snowflake Pendant
Julie Dubois


Beaded Baubles by Debby Zook, photograph by Karen Williams
Beaded Baubles by Debby Zook
3/23/14 Beaded Bauble
Debby Zook


4/27/14 Byzantine Chain
Theresa Cleary

Thursday, March 21, 2013

Fancy Fish Redux

The fish are checking out sample pages from my new tutorial
This week has been a flurry of sorting and purging to move my studio and renewed work on my Fancy Fish Tutorial.

Our Destash Sale last weekend was a bust in terms of finding new homes for our old inventory.  Turns out it was openning day for ticket sales for the Mariners and there was a Sounder's game, so the few people who did try to come couldn't find parking.  Ouch!

The hours spent in the studio waiting for visitors were productive time however, as I continued to sort through my stash.  It's really frightening how much I've collected over the years.   I'm looking for new homes for much of my fabric collection from when I used to do costume design, wearable arts and crazy quilting.  (Thanks to a link I found in my inbox this morning, I may try consigning some of it through Our Fabric Stash.  Talk about timing!)

While sorting through tubs of fabric, buttons, lace and who knows what, I also came up with a better way to organize my Fancy Fish Tutorial and ideas for several additions.  Luckily, the kind souls who'd purchased my tutorial were willing to wait a couple of days for delivery.  So it was back to the the drawing board and several more rounds of edits.  I finished it up Tuesday evening just before bedtime.  And sighed with relief.

The latest edition topped out at twenty-four book style pages.  This is my most detailed tutorial yet and the diagrams are the prettiest I've ever created.  I showed my newly refinished tutorial to my husband (who had been out of town for the past week) and my best friend yesterday and got a tongue lashing from both for underpricing my tutorials.  Chatting via email with one of the people who'd purchased my tutorial, she agreed that I'd underpriced it - especially since my license allows the purchaser to sell items they make with my pattern at local craft shows and galleries.

Bowing to their wisdom, I raised my price a little on Etsy.  However that didn't seem fair to my blog readers who knew the old price.  So, through the end of the month, you can still purchase my Fancy Fish Beadwoven Friends PDF tutorial for the old price by using the coupon code BLOGFRIENDs, which will take $3 off at checkout.  This coupon is only good for my Fancy Fish tutorial, please!  

Thursday, February 14, 2013

Freeform Peyote Bracelet - First Steps

Playing with bead selection for a new bracelet.
 I am thrilled and amazed by the enthusiasm expressed in the still-new Freeform Peyote Facebook Group.  A number of you are new to the medium and I've loved seeing your first projects!  And I'm thrilled with how many of you have joined the Choose Your Own Adventure Challenge.

I'd originally planned to put together a series of posts on the basics of freeform peyote, but as often happens, life got in the way.  Talking with my husband this morning, I wished that I'd managed to start earlier, as now that we were halfway through the challenge it's seemed a little late.  He disagreed, saying that it's never too late.  So I'm writing this post because he said I should.

Starting a new project:

Step 1:  Choose your beads and color scheme.  Above, I used the large stone bead in blue and cream with veins of sienna to help guide my color selection.  Not all of the beads shown above will make it into the final piece, but I like having options.  My plan here is to make a bracelet.

The Starting Row:

Starting row of freeform peyote bracelet by Karen Williams, copyright 2013

Starting out, I measured about a teaspoon each of a number of my seed beads onto my beading mat and added a few of my smaller accent beads.  I then strung my initial row of beads, adding a loop that fits my button just a little bit loosely at the end.

The working length here is just over eight inches.  Note that I didn't try to use all of my bead types in this first pass.  There will be time to add more later.


Stitching Back along the Length

Starting to work peyote stitch, freeform bracelet tutorial by Karen Williams, copyright 2013


Coming off the loop, I began stitching back along the length, simply matching the bead types and colors in each section.  I stitched through the larger accent beads, and through my focal stone bead (isn't it pretty in this picture?)


Finishing this Row

Finishing first row of peyote stitch, freeform bracelet tutorial by Karen Williams, copyright 2013

Here's the bracelet as I finished this first row of peyote stitch.  Again, I simply matched bead types and colors, and stitched through the larger beads.


Turning around

Starting Row 4, freeform bracelet tutorial by Karen Williams, copyright 2013

A quick view of the turn around.  In the last pass, I added beads along the top edge, now I'll add them along the bottom, working in a circular fashion around my center line.  Working both edges; first one, then the other helps keep the piece balanced and my focal bead centered.


The Next Couple of Rows

Rows 4 and 5, freeform bracelet tutorial by Karen Williams, copyright 2013

Next, I start moving colors just the slightest bit, like the size 11 seed beads just starting to encroach on the size 6s on the left hand side of my bracelet.  Note that I used two size 11s to span the space of one size 6 to keep everything laying smoothly.

I also added bridges working around the smaller accent beads.  And I peyote stitched around the bead loop.  The right hand side of the bracelet has six rows of peyote stitch in the photo above.  Then I ran out of beading thread, so I wove both thread ends into the body of my work (removing the stop bead from my starting end) and took the picture.

Rows 5, 6 & 7, freeform bracelet tutorial by Karen Williams, copyright 2013

Between the previous picture and the one above, I focused most of my attention on the left hand side of the bracelet.

     Continuing to build my initial blocks color, I dragged one color into the next over several rows.  This is my preferred method of changing colors as I think it gives a more natural, organic flow to the piece, but that's totally an aesthetic choice.  If you like hard edges between color blocks, go for it.  (That style often reminds me of Gee's Bend quilts).

    Middle left, I introduced a new block of cream as a shorter bridge around an accent bead, then used it as part of the longer bridge around the top edge of my focal, changing to antique bronze a third of the way.  I also turned the inner right bridge into a twist, anchoring the twist in place by stitching along the new edge. 

     And in the lower left I added a bridge of blue matte seed beads and one of the dyed shell accent beads. 

    At this point, the initial color blocks are well established, and it's simply time to continue building along both the top and bottom edge.


My plan is to continue this show and tell next week, with additional pictures of how this bracelet develops.  I'd love to hear what you think - was this useful?

Friday, October 12, 2012

It's Almost Live....


Front Book Cover: Corsets, Caps & Stays: Elegant Beaded Beads with Right Angle Weave
I have an ISBN number!  My newest book, Corsets, Caps and Stays: Elegant Beaded Beads with Right Angle Weave, is at the publishers.  And while I don't have a physical copy of the book itself yet, I do have its ISBN number (two actually):
      ISBN-13: 9781480074910
      ISBN-10: 1480074918
I can't tell you how exciting it is to see those numbers!

Those of you who have been following my blog for a while have likely seen the book progress. It's pretty much taken over my life the past several months, though I've tried not to write about it too much here in the blog for fear of boring everyone to tears.


editing interior book pages - successive edits
color coded edits & several takes on one page
It's such a slow process - on good days, I might finish putting together the illustrations and text for a two-page spread.  Or maybe I'd do initial layout for several pages.  Or stitch another sample while taking notes and process photos, then upload everything into my computer for revision.  Every page required multiple, multiple revisions.   It seemed at times like a never ending cycle. I came up with a color coded system to track the various edits (pink for text edits, yellow-illustrations, green-photos, blue the page's ready to print for the next review!)

But I had a hard deadline, as I want to take copies of it with me to Bead Fest Texas, which is just around the corner.  Which meant that I needed send the book to the printer in time to get it proofed AND printed.  And time kept slipping away....


PDF proof of Corsets, Caps & Stays
PDF proof from Createspace with ISBN numbers!

So I worked twelve hour days on it last week, and over the weekend.  On Monday, I spent eight hours doing a final proof, then saved the files to PDF (separate files for the interior and cover) and uploaded them to Createspace.  They promised a 48 hour turn-around for a digitial proof, but when I checked at 5:00am (yes, really) the next morning it was in.  Yeah!

Except they said that one of my images was under 300DPI, the recommended printing resolution.  Not Yeah!  So I opened my InDesign file to find the offending image.  And since I was already in the file and they'd created such lovely proofing options, I went through the book one more time.  Another three hours of proofing.

Besides sending me a PDF copy with trim marks, they also have a cool virtual proofing option that tries to show you exactly what it will look like as a physical book.  I took a screenshot so you could see what I mean. 
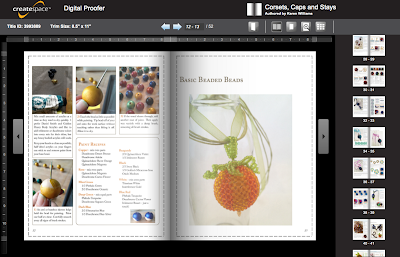
virtual proof of Corsets, Caps & Stays
Virtual proof - they even tried to simulate page turns

The digital proofing system is new since my first book and I thought it quite nifty.
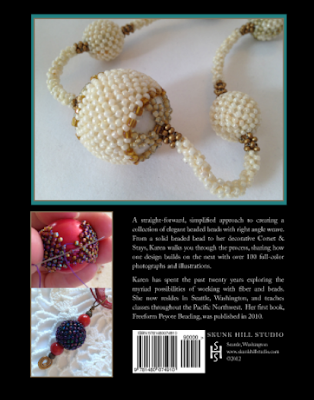
Back Book Cover: Corsets, Caps and Stays: Elegant Beaded Beads with Right Angle Weave
I have a barcode, too! 
This project started out as a class handout, but kept growing. When I taught my Corset Beads at the June Seedbeader's meeting, the handout stood at a healthy eleven pages.  Based on that class, and questions that came up, it grew to twenty five pages.  Which I thought would be it.  But I couldn't stop thinking about it, asking 'what ifs'.  So I decided to let it do what it would.  The final version topped out at 51 pages.  A short book, but a long tutorial, which is the way I still think of it. 

It's a very hands-on and project oriented, with explicit bead counts and stitching instructions.  This is so different from my freeform peyote beading that I'm still vaguely stunned that I managed it.  I spent an entire summer counting stitches and making diagrams!

Unlike Freeform Peyote Beading, which starts with an extensive design section, this one dives right into the stitching.  The first chapter reviews the stitches - all the different aspects of single needle right angle weave used in the rest of the book, talks a little about needles and threads, and has a quickie tutorial on painting wooden beads.  Then it's off into the projects.

Chapter head: Corsets, Caps & Stays Beaded Beads
Chapter Head Screen shot
There are three chapters on different styles of beaded beads, each with multiple samples and design variations. First up are the 'solid' beads, completely covered with bead weaving.  My Corsets & Stays beads, with their central band of beading laced onto the base bead (hence the reference to corsets) come next.  Then my Caps & Stays beads, with two beaded end caps connected by right angle weave stays.  I rounded the book out with a chapter on Finishing Touches, including a beaded bail, the spiral twists and the leaf from the bead shown in the proof above, a beaded rope and toggle and some ideas for incorporating the beads into larger designs.

So now all I have to do is wait for the books to arrive.  That will be like Christmas.  And a little scary too - there's that little fear, too.  What have I done!?!

In the meantime, I'm working on kits for Bead Fest and to add to Etsy.   I'm finally starting to get a system together and streamlining things there, too. 

Wednesday, June 27, 2012

101 Facebook Fan Winners

Thank you everyone who entered my 101 Facebook Fans drawing either here or over on Facebook itself! 

There were a number of different places where you could have entered - including several different threads on Facebook, although you did actually have to comment to enter.  So I printed them all out. taking screenshots of the comment threads from Facebook, because I couldn't figure out an easier way to do it. 

Then I sat down and numbered the entries - adding extra entries for those of you who had taken to post on your own blogs and Facebook pages.  Thanks for that!  In the end, I had 48 entries.  I gave 49 & 50 to Lyn Owen over at Silvermoonlyn as a thank you for all of the traffic she sent my way and to bring my drawing to a nice round number.

First up were the earrings, freeform peyote and right angle weave from my Earth & Sky colorway.   


freeform beaded earrings by Karen Williams, Earth & Sky color way
freeform beaded earrings, Earth & Sky color way

 I used Random.org for the number generator, and Narelle Donald; number 22 was you. 


Then it was time to draw for one of the two kit packages. The winner will get to choose from Package A: a combo pack with kits for my Lacework Bracelets and Corset & Stays beaded bead.  Or package B: containing my book Freeform Peyote Beading and a special kit in the color way from my Autumn Rain bracelet (which incidentally has been the profile pic for Skunk Hill Studio's FB page from day1)

Package A: cover pages for the two tutorials

Package B: Freeform Peyote Beading special kit

Turns out, Lyn didn't need the extra two entries for sending people my way.  Her number came up for her blog comment. 

So now it looks like I'll be shipping two packages round to the other side of the globe.  Narelle and Lyn/Lynette, please email me with your contact information so I can get these out to you.  Lynette, I'll need to verify which kit package you want. 

Thanks again to everyone who helped make this giveaway a huge success!  This was a full order of magnitude larger than the last drawing I did back in the fall.

Saturday, June 16, 2012

Still not done, but boy have I been busy

Freeform peyote ruffles, process photo collage by Karen Williams
On Tuesday that I'd post my finished piece from the Time to Stitch blog hop today.  Well, as the title indicates, it's still not done.  Just in case anyone did indeed decide to check back, I thought I should at least post an update. 

I've managed another two or three hours of stitching since Tuesday, so not a lot. I do like what's starting to happen with the curls on either end.  It's about time to start working on some ruffles along the edges mid-center.  The question is whether I add the poppies now or later.  Placing them now will make it easier to know where I want the ruffles to frame them.  But working around them will be far more difficult.


Lacework Bracelet PDF tutorial featuring right angle weave by Karen Williams
So what else has kept me busy this week?  Thanks for asking!  Mostly I'm working to finish up a couple of different e-book tutorials which also double as class handouts when printed. 

I'm in the final stages of proofing and editing a complete overhaul for my Lacework Bracelet tutorial, expanding it from eight to sixteen pages.  The overhaul included replacing many of the old photographs with new, better ones, expanding and improving the section on color mixing, adding several new project notebook pages which walk through the creation process and reviewing all of the text instructions.  I may also decide to replace the images on the cover.

I've included a screen shot of one of the two-page layouts below, just to give you a feel for what I'm doing with the interiors.
 

Lacework Bracelets tutorial by Karen Williams
2-page spread screenshot from Lacework Bracelets
Corset, Caps & Stays Bead Beads tutorial by Karen Williams
 I'm also working on the tutorial for my Corset & Stays Beaded Beads.   The Tutorials full title is "Corset, Caps & Stays" because I plan to include two distinct, but related patterns.  The corset beads shown below, and then their opposites, with beaded caps and open stays across the center of the beads. 

The tutorial also includes detailed diagrams and instructions for single needle right angle weave, including decreases, two different types of increases and joins - expanding upon the free instructions from my website. 

My hope is to have both available on Etsy before the end of June, with kits to follow shortly after. 


Wednesday, October 26, 2011

How Many Times?

original pattern layout
I'm really starting to wonder exactly how many times I'm going to have to make and photograph this particular set of earrings in order to create a great pattern. 

In the first example, at right, the color's good, but the pattern isn't precise because when I made this pair, I wasn't worried about reproduction and was simply designing as I stitched. 

So I thought I'd try again.  Two pairs later, and I had one earring from each pair which fit the pattern, nicely photographed and documented.  Yeah! 

Back to my page layout....


2-page spread with new samples

But as I worked, I discovered several things.  1) I was missing one of the photographs I needed for my flat spiral earring.  2) I tended to flip the pieces back and forth in the photographs which confused me several times.  If it confuses me, I count it as a definite flaw in the instructions.  And 3) I didn't like having earrings from two different pairs - it seemed the patterns should be for a 'matched' set.

So, back to the drawing board...

2-page spread for one earring now - pattern's growing
I now have all the pictures I need for a matched set of earrings, the pieces are all facing the same direction in the photos.  And after restitching this pattern several times, I've proofed the text to within an inch of its life.  I've even added diagrams to my layout!

I showed the spread to my husband, triumphant to be making forward progress.  His comment?  The yellow is too similar to the background grey.  So, now I have to decide - do I leave it as is?  (I would agree that the yellow/blue/green color combination of these earrings isn't as visually interesting as the other combos).  Are they good enough?  Or do I try one more time? 

One of the photos in question - sufficient contrast or no?