Studio Musings

Saturday, September 29, 2012

The Snow Queen - My First Foray in Working with Sequins

Snow Queen necklace, freeform RAW, beaded snowflakes, sequins
my Snow Queen necklace in all its icy, sequined splendor
Sarah over at Saturday Sequins finally tempted me into trying my hand at incorporating sequins into my bead work by hosting her first ever Blog Hop focusing on, you guessed it - Sequins!

Most of the beading I've seen with sequins involved bead embroidery, but I'm more of a bead weaver sort of girl, so I had to try to come up with something that better fit my personal style.


Work space with beads and inspiration - getting started
I also had to come up with sequins, since my stash contained nary a one.  Sarah, hearing of my dilemma, sent me some - in pinks, light blues and iridescent whites.  Hmmmm....

They sat on my work table for a couple of weeks, as I tried to figure out what in the world to do with them.  Then I received an odd, clear blue glass bead in a goody bag.  It rather looked like a lifesaver.  I almost gave it away until I had my Eureka moment - the sequins colors reminded me of snowflakes.  And that blue bead suddenly had a purpose!  It could be the heart of winter, trapped in an icy pendant.

I had my story! Now I could stitch.  


my base layer of freeform right angle weave trapping the bead
I started with the pendant itself, capturing it with some fairly freeform right angle weave.  I decided to use RAW instead of peyote because its more open stitch pattern would make it easier for me to go back and add the sequins over the top. 

Here's the pendant before I started adding any sequins.   I couldn't resist adding some larger beads, and I'm working with five different shades of white seed beads - from stark white opaque to completely clear.  The skewer helps hold everything in place while I stitch.

And then I used my Snowflakes pattern (the first thing I ever listed on Etsy). 

Here's a closeup of the finished pendant (can you see - I even stacked some of the sequins, blue under white?):
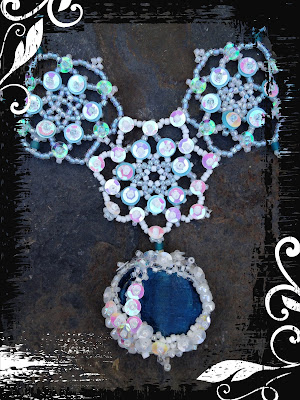
freeform RAW beaded pendant and beaded snowflakes with sequins
Closeup pendant & central snowflakes

So there's my contribution to the hop.  Sure hope Sarah likes!

And I can't wait to see what everyone else came up with!  I am definitely looking at different ways people incorporate sequins.  I have some weird, long sequins that remind me of icicles or white claws that I couldn't quite figure out how to use (you can see them in the right corner of my workspace photo).  If you have any ideas what to do with them, I'd love to hear them!

Participants!!!!


Dita... http://alankarshilpa.blogspot.com

Ambra... http://chicandfrog.wordpress.com

Audrey... http://hotpinkquilts.blogspot.com

Stacy... http://iridalsattic.blogspot.co.uk

Karen W...  http://baublicious.blogspot.com

Lori...  http://www.prettythingsblog.com

Lisa... http://lisabinkley.typepad.com

Carmi... http://resincrafts.blogspot.com

Dawn Marie...  http://designsbydawnmarie.blogspot.com

Jeannie... http://site.jkdjewelry.com/blog

Shirlee... http://www.shirleestuff.blogspot.com

Linda... http://www.lilysofthevalleyjewerly.blogspot.com

Corrine... http://www.sparkledaysstudio.com

Gutukas... http://atradimutakeliais.blogspot.com

Shannon... http://uptwnsh-fallingintothesky.blogspot.com

Mallory... http://rosebud101-fortheloveofbeads.blogspot.com

Cyndi... http://www.beading-arts.com

Maneki... http://wildrosesandblackberries.blogspot.com

Maryanne... http://zingalasworkshop.blogspot.com

Ine... http://jewelsbyine.blogspot.com

Karen... http://www.overthemoon-design.com

Kepi... http://kepirasmussen.blogspot.com

Jennifer... http://jenniferstumpf.blogspot.com

Misty...  http://thejollyfatelf.blogspot.com

Dot... http://speediebeadie.blogspot.com

Hope... http://craftyhope.blogspot.com

Cynthia... http://antiquitytravelers.blogspot.com

Micheladas... http://www.micheladasmusings.blogspot.com
Xtra photo - playing with sequin placement

Shirley...  http://www.beadsandbread.blogspot.com

Karla... http://texaspepperjams.blogspot.com

Eleanor... http://eleanorpigman.blogspot.com

Therese... http://theresestreasures59.blogspot.com

Rita... http://www.toltecjewels.blogspot.com

Robyn... http://rcponders.wordpress.com

Stepha... http://skwds.blogspot.com

Sue... http://suebeads.blogspot.com

Cate... http://fulgorine.wordpress.com

Amy... http://Loraamyjames.com

Thursday, September 27, 2012

Whole Lotta Beading Going On This Weekend

If you're in or around the Seattle/Lynnwood area this weekend, then I cordially invite and indeed urge you to check out the Northwest Bead Society's annual Bead Bazaar.  For anyone who loves beads, this is definitely a "gotta go" sort of thing.  There's a great line up of vendors, including a booth for the Fire and Rain Society - I spent a lot of time drooling there last year.  And came away with a number of spectacular treasures, even if my pockets were a bit to let.  There is an admission fee of $6.00, but it's for both days and goes to help support the Bead Society.

And then there's the lecture schedule!  Once you're in the door the lectures are free and run 50 minutes.  Look at the line up: 

Saturday
Pendant by Linda Larsen
12:00 - 12:50 Riveting
Linda Larsen 
Learn how to attach a stone or glass bead without soldering.

1:00 - 1:50 Cold Connections and Fold Forming
Juan Reyes     
Create a simple clasp & transform a flat sheet of metal into a 3D object.

2:00 - 2:50 Little/Big
Lynne Magie   
Using small beads to showcase the beautiful art bead you just purchased.

3:00 - 3:50 Polymer Clay Color Transfers
Sarah Wilbanks  
Polymer Clay Color Transfers for beads and pendants

Sunday
12:00 -12:50 Viking Knit
Kathy Repp     
Basic & Advanced techniques - from simple chains to variegated, stripes and inclusions

Seedling Hinged Bracelet by Marlo Miyashiro
1:00 - 1:50 Improving your Small Object Photography for Internet Images
Marlo Miyashiro
Marlo gave this lecture at the School House Craft conference I attended last weekend and I HIGHLY recommend it!  She has some great insights and is an awesome source of knowledge. 

2:00 - 2:50 Going Rogue with Free Form Beading
Karen Williams
Ever wonder what's involved in freeform bead weaving, or how to start without a specific stitch count or pattern?  Karen shares a look into her process from start to finish in creating original, organic designs.

(Since it's my blog, I shared my description instead of their summation.)

And if you're not tired out from the lectures and the shopping, there's also a series of "informal demos" on both days.  They may be informal, but on Sunday I'm scheduled to talk about:

11:00-12:00, Peyote and Right Angle Seedbead Weaving
Back to basics here - just the basic stitches, can you believe it?     

12:15-1:15 3D Sculptural Seedbead Weaving
This will be a bit of a trunk show, mostly.  I'm planning to bring a number of pieces, both completed and works in progress.


Monday, September 24, 2012

Analogous Colors - Kissing Cousins or Noisy Neighbors?

For this seventh installment of my weekly design series, I'm continuing along with the color wheel, this time looking at Analogous Colors. 

Analogous Colors are next door neighbors on the color wheel.  They go together quite naturally due totheir close proximity.  In fact, sometimes it can be hard to decide where one color leaves off and the next begins. 


Take the paint color Cadmium Yellow Medium for example.  Is it really, truly yellow, or is it orange?  My eye tends to say it's the later, especially when compared to the bright, sunny shade of Lemon Yellow. 

A quick peak at the two color charts to the right and you'll see what I mean.  That's where the 12-step color wheel comes in handy.  In my world, I label Cad Yellow Med yellow-orange and count it good.

But from paint mixing terms, you can see that it is a yellow, because when mixed with blues I get a series of green intermediaries, not browns or neutrals (this is something I'll revisit again next week when I talk about complimentary colors). 

Cad Yellow Medium and Lemon Yellow are also great examples of warm and cool hues of the same color.  I'll let you guess which is which. 


Here are a couple of other Analogous Color Combos from my painted color studies. 

Cadmium Yellow Med again, this time paired with Napthol Crimson, which is a fun red with a bit of blue undertones. 

The vertical swatch of red in the top right hand color is an unmixed example of the crimson.  Mix it with just the teensiest bit of cad yellow and you get the bold red of the horizontal stripe.

So warm and yummy!  You could totally turn this into a fall color scheme.

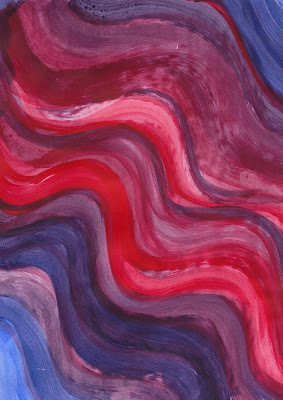
The purples in this mix are quite warm, indicating that both the red and blue had distinct red undertones.  

This color combo is very dramatic, and makes me think of Flamenco.   Probably because the purply reds make me think of shadows in the ruffles and flounces of a flamenco dress. 
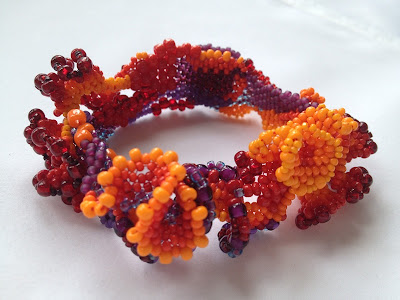
Freeform peyote bracelet shading from yellow-orange to violet through the warm side of the color wheel
Here's my Spanish Dancer freeform peyote bracelet again.  I debated adding it to this post, but I just couldn't write a post about analogous colors and not include it.

It's has an extended range, encompassing half the color wheel from yellow-orange all the way through to violet, but it's definitely an analogous color combo in the ways that the colors flow from one to the other. 


hand-beaded fish in purples, blues and lavender


And here's one of my little Fancy Fish.  I made this one for my husband, so I was going for more masculine colors, so I stuck with the blue/purple sides of the color wheel. 

It's almost the same colors as a Japanese fighting fish (except its fins were a deep purple-black) I had in college and I figured, what could be more masculine than a fighting fish? 


So now it's your turn?  What are some of your favorite analogous color combinations?  I'd love to see them.

Friday, September 21, 2012

And the Lucky Number is 3


I spent the day at the School House Craft conference. 

It was billed as "a dynamic three day conference for people wanting to gain the skills to run a successful creative small business" and I have to say that Day One definitely lived up to the billing.  I have pages of notes and action items from the sessions I attended, as well as reports on some of the other sessions. And I received some great feedback about my kits from some of the other people sitting at my table over lunch. (Yes, I pulled out two of my bead kits to see what people who knew nothing about beading, but lots about handmade, thought of my presentation.  I'm shameless!)

I promise to write more about the conference, but you may have to wait a week or two until I have time to digest it all first.

In the meantime, I promised to do a drawing for the next stop in the Art Bead Love Chain Tour.  So, drum roll please!  I decided to let Random.org do the honors.....
 
And it looks like the Art Bead Chain will be heading to Cindy at Devine Designs next.  Cindy - I will be emailing you to invoice you the $6.00 for shipping for the chain. 

Monday, September 17, 2012

Me, Myself and I - Monochromatic Color Combinations

Continuing in my design series, today I'm thinking about monochromatic color combinations.  Designing around a single color.  The single color works as a strong Unifying element, but since we're only using one color, Contrast has to come from somewhere else. 

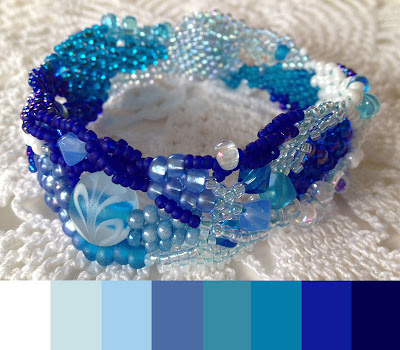
Ocean Currents, freeform peyote bracelet with color palette
Ocean Currents, freeform peyote bracelet - blue, blue and more blue
Truth is, I don't work with monochromatic designs every often.   When I do, I tend to make liberal use of Value such as my in  Ocean Currents series. 

Here, I shade from bright white to deep blues. 

I'm also using Undertones to provide additional contrast - with both warm and cool blues. But I've stuck with relatively pure, intense versions of each hue. 


Leopard Jasper, freeform peyote choker with color paletteIn my Leopard Jasper choker, I shade from a light cream, through dark chocolate, ending on the other end of the value scale at black.

Brown is more often considered a neutral, rather than a 'color' in and of its own right.  That said, there's no reason why you can't use it as the focus of a monochromatic composition. 

You just have to find interesting enough browns.  I combined warm, rich browns with more neutral antique bronze beads (which worked well with the antique bronze button). 


Lariat by Malin de Konig
Adding Neutrals for Contrast

Malin de Konig graciously allowed me to use the picture at left of her lariat.  

In this clean, elegant design, Malin combines a single shade of red with a warm, rich neutral brown and antique brass. I love how it allows the red to sing and take center stage. 

Check out Malin's blog post to see additional pictures.


Additional Resources
Looking for other samples of monochromatic compositions, I put together a Pinterest board, aptly named Monochromatic Jewelry Designs, using a number of the pieces from Sally Russick's One Crayon Color challenge from earlier this year. 

Sunday, September 16, 2012

Time to Share the Love - of Art Beads!

Dithering.  That's what I've found myself doing this week.  In my spare moments I'd pull out the tray displaying the Art Bead Love chain and look through all the beads.  Every time I looked, I found something new I hadn't seen before.  And each time my decisions as to what to take and what to add changed.  

How to choose?  That became the question of the week.  Followed immediately by what to add?  There were no samples of seed beading on the chain, so I felt honor bound to uphold our collective Seedbeaders' honor and add some beaded beads.  But I didn't want to overwhelm the chain, either.  I tried to figure out how to turn my flowers into beads that non-seedbeaders could easily use (the key here being easily) and my brain just wasn't functioning sufficiently this week, so no go there.

What did I decide upon?


 Here's what I ended up taking:

Taken from the Art Bead chain


Just added to my stash! 
Clockwise from top:  two gorgeous polymer clay pendants by Moobie Grace, glass swirl disks by Heather at HMB Studios,  a couple of lampworked focals that spoke to me, including Pam Ferrari's lampworked bead that reminds me of poppies and two little green sugar beads by Sue of Suebeads, a porcelain leaf by UniqueButtons, and in the photo above, a little bronze acorn by (I think) Kelli Pope.

I spent a fair bit of time looking through posts from the previous chain holders to track down the origins of these different beads, and updated all of the links below so that they lead directly to the Art Bead Tour posts on each blog so you can more easily track its progression.

And here's what I added:


I included my most recent my Corset bead, playing with fall color schemes, and several smaller beaded beads.  The small orange beaded bead at right is supposed to be a pumpkin.  What do you think?  Up top are two of my very own lampworked disks and top right is a paper clay bead I made with a copper tube rivet for the bead hole.  And left and right there are two lampworked beads by JulsBeads to round things out.

two beads by JulsBeads


Soon, it may be your turn for a visit, because it's time to find the next stop on the tour.   I will be doing a drawing this coming Friday, September 21st.  So leave a comment here and spread the word on FB, your blog, twitter and friends.

To recap:
 The Art Bead Love Tour is an ongoing project to spread the love of handmade to new and exciting places.  It's a way to reach people who may have never stumbled upon your blog on their own, and give them a chance to share the love of handmade.  A chain was chosen to link beads as a symbol of how this project links us all together ~ in our unity to stand behind handmade.
The winner of the chain will be allowed to take up to 30 beads from this chain. They will then replace each bead they took with another handmade bead, charm or pendant of equal Quality.
(SO  Remember-----You're NOT winning the ENTIRE CHAIN---Just a chance to take some beads from it.)

PLEASE READ THE INSTRUCTIONS BELOW
I know there's a lot to read, but it's really important!!!
It is so important that the quality of the beads be maintained, so we can keep the Art Bead Love Tour alive.  We want to share consistent quality with the next winner.  If you make your own handmade beads or components, it's a great way to get your beads into the world for people to try them out, or, if you hoard collect art beads it's a great way to share your collection and get some new additions as well.
(Art Beads should be handmade by an artist, and not mass produced, such as Hill Tribe Silver beads or others like them.)
Remember, the focus is on creating handmade with handmade and beads/components taken should be replaced with beads/components that are made by an indivdual artist not an organization.
Here's where the chain has been:
Your name here            


Here's how it works:
(Please read the entire post before entering.)
1. The winner of the chain will be allowed to take up to 30 beads from this chain.  They will then replace each bead they took with another handmade bead, charm or pendant of equal quality.
2. The winner will post pictures of what was taken and what was added, in order to keep an account of the chain's progress and to keep our followers drooling.  Please be sure to give credit to the bead artists as well (if you know them). 
3. The winner will then have a giveaway, just like this one,to keep passing the chain on and on.  Rules can be copied and pasted from here.
4. When you repost your giveaway (remember you can copy and paste from here)-a list should be added to show where the chain has gone, with links to each previous blog.Ultimately, this will end up a very long list!
5. Chain must be shipped to its new home via Priority Small Flat Rate box with delivery confirmation. Please package it carefully.
6. There will be a button on the Love My Art Jewelry website that links to the current blog and giveaway-so if you have the chain, it will link to your blog, that way our followers can have another chance to win it.
7. You MUST exchange your beads and have your giveaway completed within two weeks of receiving the chain.
(Please, please, please, if you can not adhere to the above rules, do not enter the giveaway at this time.  It will go on and on and you can always enter at a later date.) There will be a button on the side bar of our blog so that you can track where the chain currently is.
Here's How to Enter:
1. You must have an active blog to enter.
2.  Leave a comment below (make sure your email is linked to your blog or leave it in the comment.  Entries without emails will not qualify)
3. Share on Facebook, Twitter or your blog for extra chances to win. Leave a comment for each way you share, with a link if possible.
4. Winner will pay shipping and will be billed through Paypal-small priority flat rate box with delivery confirmation, $6.00.
5. Open only to our readers in the United States-due to problems with tracking and shipping overseas (sorry).

I will draw a winner on Friday, September 21st. 

Monday, September 10, 2012

Rays of Sunshine on a Cloudy Monday

 I've been under the weather the past few days and running on fumes.  My to-do list is about a mile long and is all I seem to dream of at night right now.  But I've had several huge rays of sunshine recently, including two packages in the mail.  So I thought I'd share. 

The Art Bead Love Tour package arrived on Friday.  This chain is far longer than I had realized from pictures and there are so many lovely art beads.  Every time I look, I see another lovely I hadn't noticed before.  I'm simply oohing and aahhing over all the beads right now - will make some decisions of what I'm taking off and adding on by the end of the week.  I'll post the drawing for it's next stop then, too.


And then on Saturday I received a surprise package from Kalmbach Books.  I'd forgotten that I'd signed up to participate in their Bead Soup Party to celebrate the upcoming release of Lori Anderson's book Bead Soup.  


 To make it more fun, the Bead Soup mix is from Beauty and the Bead, a sort of local beading store from Bellingham up near the border. 


Isn't that owl fun?  He sure makes me smile.  Now just have to figure out where he belongs in time for the November 2nd reveal.


And today, I received an email from Karin Slaton of Backstory Beads saying she'd awarded my blog the One Lovely Blog Award.  Thank you Karin!  You truly did make my day.

As you've probably guessed by this point, I'm skipping the design post this week - just haven't been able to finish it up to my satisfaction.  But I'll be back with that next Monday.  Promise. 

Tuesday, September 4, 2012

The Art Bead Love Tour is Headed for Seattle!

Art Bead Love Tour Chain
Found out over the weekend that I'm going to be the next stop in this fabulous tour! 

I can't tell you how excited I am!  I've watched the tour's progress from blog to blog and now I'll finally get to see all these lovelies in person. Definitely happy dance time.

I've already started going through my collection, trying to decide what I'll add to the mix.  As for what I'll claim from the chain; I'll decide that once I see it in person.  And then, after a short stop in Seattle, it will be off again to its next US destination. 

If you haven't heard of the Art Bead Love Tour, Pam Ferrari, who currently has the chain and the author of the popular blog Wait One More Bead, summed it up beautifully in a previous post, so I'll quote from her:
"The Art Bead Love Tour is an ongoing project to spread the love of handmade to new and exciting places.  It's a way to reach people who may have never stumbled upon your blog on their own, and give them a chance to share the love of handmade.  A chain was chosen to link beads as a symbol of how this project links us all together~in our unity to stand behind handmade."
So stay tuned for future posts and your chance to win a stop on the hottest tour of the season!

Thank you Pam!  

Monday, September 3, 2012

The Color Wheel - One Big, Happy Family

Basic twelve-step Color Wheel

Everyone's seen at least one Color Wheel in their time, likely you've seen a half dozen or so.  Most have a lovely rainbow of colors like the one above.  We have:
  • The primary colors: red, yellow, blue.  
  • The secondary colors: orange, green and purple/violet.  
  • Then there are the tertiary colors, sandwiched between the primaries and secondaries: red-orange, yellow-orange, yellow-green, blue-green, blue-violet, red-violet. 
You know the drill.

However, the Color Wheel itself isn't the purpose of the exercise.  Rather, it's simply a tool to help us better understand the Relationships between the various colors on the wheel.  Because all the colors  on a particular wheel are defined by their relationships, you could say that they are one great big color family, bound by a number of familial traits.

A particular color wheel, familial traits, you ask?  Yep!

The colors are linked by the traits we looked at in earlier posts  - Undertones, Value, Intensity and Color Temperature. 

This means that you can play with varying these traits uniformally around the color wheel to study and develop alternate Color Families.  The key is to change them uniformly while obeying a few simple rules, so that the color relationships always remain the same.

For instance, yellow is always the lightest color and violet the darkest in terms of value on any given color wheel.  So if you decide to create a color wheel of pastels, you'd need to keep this in mind.  If violet somehow ended up lighter than the yellow, it simply wouldn't look right for that color wheel.

Three Rules (or Strong Suggestions) for Color Wheels:

1) Value: As noted above, purple is always darkest (has the lowest value), while yellow is always lightest.  Also, the red and green should have approximately the same relative values.

2) Color Temperature: Orange is always the hottest color in any particular color wheel.  Blue is always the coolest.  Again, if you create a color wheel that breaks this rule, it simply won't look right.

3) Intensity: All of the colors in the wheel should have approximately the same relative intensity.

In the traditional color wheel pictured at the start of this post, all of the colors are fully intense versions of their base colors.

my stab at an Earthtoned Color Wheel
But you could easily create alternate color wheels.  For instance:

If you wanted to make a color wheel of Earth Tones, you'd likely want to look at less intense, warmer versions of each of the colors.  You might or might not mess with the values.

In the color wheel of pastels I mentioned earlier, you would lighten (raise) the value of each of color, while making sure the value relationships between the different colors remain constant. Because, of course, constancy is essential to any good relationship!

You could even make a color wheel of neon colors, were you so inclined.  So long as you work within the basic relationship rules, you're good to go to build a spiffy new, custom-made color wheel.  


And since I'd love to see more participation with this series, I'll issue a challenge.  If you put together your own unique color wheel in any medium (beads, paint, paint chips, yarn, etc), name it, photograph it and either email it to me or post it on my Facebook page by September 11th (my anniversary) I'll enter you in a drawing to win the beaded bead pendant from my most recent Bead Soup.  I'd love to hear from you!

Saturday, September 1, 2012

Lunchbox of Holding

I received this little beauty as a bit of a gag gift for my birthday.  My friends all know I'm a bit of a Disney nut, so this was the wrapping for their 'birthday survival kit'.  The plan was that I'd then pass the lunchbox along to me niece.  A grown woman can't possibly cart around a princess lunchbox was their supposition, I think. 

Since I'll see Emme in person in December, I figured I'd give it to her then.  In the meantime, I could use it as a bead storage box.  Seemed like a clever plan.


The lunchbox isn't as big as the one I had as a kid.  I had a Little House on the Prairie lunchbox, with a matching thermos.  I carried it back and forth through at least three grades of school.  Laura, Mary, Ma and Pa were my constant lunchtime companions.   How about you; do you remember who was on your lunchbox? 

It may be smaller than the old style lunch boxes, but it holds a ton.  This thing is like the Tardis or a bag of holding (yep, my geeky antecedents are leaking out)!  It's incredible how much it holds!  Just look:

 A peak inside, but wait, it gets better....


All of that was packed inside the lunchbox - including my normal travel bead box.  It's a full bead studio on the go!  I fear that Emme may not get her lunchbox after all.  Or maybe I'll have to go out and buy her her own.  I think this one's taken.