Studio Musings

Wednesday, October 7, 2015

Traveling Lightly with Beads

September was a crazy-dazy month with not one, not two, but three of out town trips.  These included a visit to family in Southern Oregon, the bead retreat where I made Dali, and finished up with a transatlantic cruise (more about that in an upcoming post).  With all of this travel, I've had a great deal of incentive lately to rethink the way I travel with beads.

One of my 'problems' is while I think I know what I want to work on, my ideas often change as I get into a project.  It's so frustrating when I know I have the perfect beads for the piece I'm working on; in my studio a hundred (or a thousand) miles away back home.  The obvious solution is to bring LOTS of different types of beads, right?  Except for the little problem that beads get heavy fast!  This might not be a problem if you're traveling by car.  But we were planning a two-week trip for two with minimal luggage: two suitcases total (one carryon-size), plus backpacks. 

To make it a little more complex; I never know when I start whether the piece will later become a tutorial, or possibly even a kit.  Just in case, I need to be able to figure out not only what beads I used, but how many of each. 

Oh, and I also wanted to be able to bead wherever I was, so I wanted to bring some sort of rigid beading tray as well as my bead mat. 

My Goals

  • Bring as many type of beads as possible
  • Keep their weight and packing volume as low as possible 
  • Ability to track/guesstimate the amounts I used in any projects while away
  • Bead storage should also serve as beading tray, protect finished projects
  • Make it as easy as possible to see the beads (I just added this one!) 


The Solution:  Beading "Kits" and a Repurposed Beading Box


weighing out beads
For bead storage, I decided to make up 'bead kits', using little plastic baggies for each bead type. The largest bags I used were 2x3"s. These larger bags I reserved for the sea glass which wouldn't fit safely into smaller bags.  I wanted everything to lay as flat as possible to reduce the chances of breakage in transport.  Most of the baggies were 1 1/2" x 2".


Compact, but jumbled
Using my little scale I measured out my seed beads; 5-12grams each for most of my size 11s and 8s, about half that for 15s. Then labeled each of the baggies with bead types and weight.  This way, when I returned, I could re-weigh any beads I used and simple subtraction would give me amounts used!  This took me the better part of an afternoon, but it went fast, especially as I spent the time listening to an audiobook.  But lots of little baggies are hard to track; they can get lost and it can feel like searching through a needle in a haystack to find anything.


Kit Building Tip: put the tape on the paper, not the baggie 
 The next step was to find a way to organize and store the beads so I could quickly see everything.  For this, I used half-sheets of heavy cardstock and double-sided tape.  Working up from the bottom of each sheet, I arranged the baggies in color families.  The finished 'kits' it incredibly easy to see everything. And they look pretty too!  Best yet, I've found if you stick the tape to the paper first and press it down well, it makes it easier to remove and return the baggies, and the tape will continue to hold them securely in place through several repeats.


re-purposed as a beading box (thanks John!)

  That just left the question of what to do for my beading surface.  The solution here was much simpler - a beautiful cigar box a friend had gifted to me.  Made from an extremely light-weight wood, the box is quite slim, less than two inches tall.  Opened, both sides lay almost flat.  I cut Vellux beading mats to fit both the lid and the bottom.  I prefer working out of the lid, as the lip is not as deep.  The box holds all of my beading tools, and two-three of my beading kits or finished pieces. 


Inside the box, with stored kits & beading supplies
Using the lid for a beading tray and the box for storage
The beads that traveled with me
Stacked, the five kits are still smaller than most hardcover books
Every time I travel, it seems I try different storage solutions, looking for the 'best' way to carry the widest variety of beads.   I've been working through iterations of my current system for the past year; so far it seems to be working pretty well.  On this latest trip, I brought eighty-nine baggies filled with different types of beads and findings organized into five 'kits'.  The whole kaboodle (five kits, bead box and beading tools) weighed in at just under 2lb, 6oz (just over a kilogram).   Not too bad! 

So that's my current solution.  What are your favorite ways to travel lightly with beads?

Wednesday, September 23, 2015

Dear Dali - It's nice to meet you!


I love Dahlias! Funny thing is, I'd never even heard of Dahlias before moving to Seattle, but I quickly fell in love with the bright, big, spiky blooms and their extravagant colors.  Gladiolas may be the 'official' August birth flower, but I've decided to trade them in for Dahlias.  Done!

Last month, I'd decided my next Happy Fish would feature flowers.  Fast forward to September and I'd still made no significant progress.  Nothing seemed right.  Then I spied these beauties for sale at a corner grocery on the first day of the bead retreat.  I walked by them three times before deciding I had to have them.  They reminded me of the quinacridone pigments which make up some of my favorite red, orange and violet paints.  Such rich, luscious color!  The Dahlias' color and the shapes of their petals inspired my newest Happy Fish.

I call her Dali.... 

Dali's under-sketch with artist pens
Here she is in all her finery, happily posing for the camera


Thursday, September 17, 2015

Bead Retreat Weekend - Vashon Island

The view from the back deck of Camp Burton's Dining Hall
I spent last weekend in the company of eight amazing women and fellow artists at a mini-bead retreat.  The setting couldn't have been more perfect.  We stayed in the cutest little house at Camp Burton on Vashon Island.  A short ferry ride from Seattle, Vashon feels like another world.  It's like stepping back into time to a slower-paced world then sideways into an artist community.  Ice-cream shops have huge front porches, flanked by artist collective boutiques and the coolest 'junk' shops.

What I think I love best about retreats is the chance to step away from my everyday to-do lists and focus on simply being and creating.  Stitching, beading, a little sketching, walks along the beach; the little things that bring such joy.

The luxury of leaving home for a long weekend is fantastic.  I started and finished several pieces while I was there.  Which makes me wonder if the magic can't be captured even if you stay closer to home.

Talking with a friend, she mentioned that she periodically hosts 'mini-retreat stitch-ins' at a local community center.  She reserves the room for the whole day, invites friends, buys snacks, even arranges for door prizes.  And when the time comes, she leaves all her cares at home for the day while she spends the day with friends.  Have you ever done a single-day 'mini-retreat'?  I'd love to hear what arrangements you made and how you thought it worked.

My beading table - I organize my beads like kits to save space in packing
clam shells encrusted with barnacles
Another view from the island, at low tide

Thursday, September 10, 2015

Signs of Fall - Beaded Acorns

my 'acorns' look right at home with their forest counterparts
The weather here in Seattle is cooling fast; the dog days of summer are gone and we're quickly heading into fall with a week's worth of rain.  The leaves haven't started turning yet, but acorns are falling everywhere I look.

Walking home last week with a pocket full of acorns, I decided to pull out my beaded acorn earrings tutorial.  Never fully satisfied, I reworked things, adding several new diagrams and brand new photos.  The tutorial's now up on my Etsy store.


I lied - one single branch on the tree outside my front door has turned!

Happy Autumn! 

Thursday, August 27, 2015

Summer Snowflakes

my Snowflake tutorial - still available on Etsy
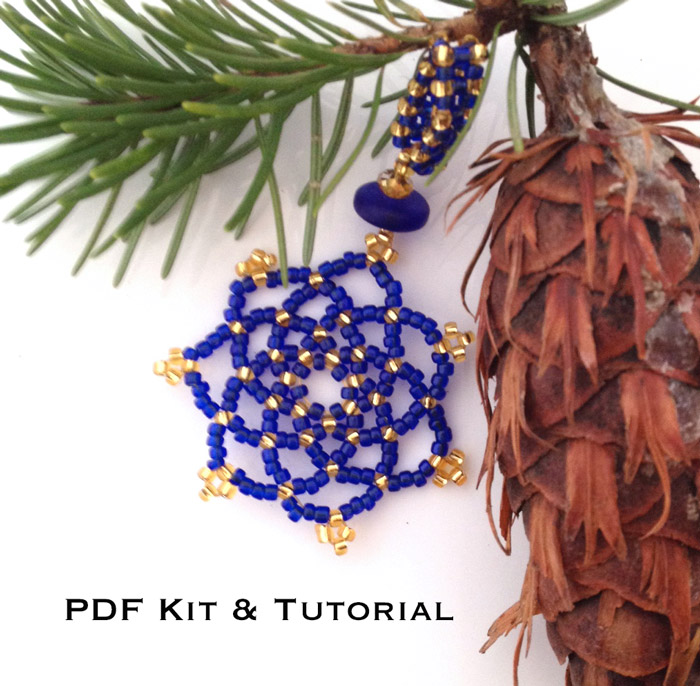
Back in 2011, I opened my Etsy store with exactly one item - my beaded Snowflakes and Stars PDF tutorial.  For some reason that I cannot now remember, I didn't list my first book on Freeform Peyote Beading until months later.   Needless to say, I have a soft spot for these little beauties.  They're rather the potato chips of my beading world.  I can never seem to make just one, and they're a quick and satisfying 'beading snack'.  When I don't know where I want to go with other projects, I find myself making snowflakes.

Most recently, I've been playing with Summer Mandalas, and sequins.  What happens to snowflakes when you use other colors?  Here are a couple of my discoveries.


First, I decided to work with Hot, summery colors in reds and oranges, with a pop of cool lime:

Summer beaded Snowflake Mandalas in red, orange, pink and lime green with sequins.  Pendant and necklace set by artist Karen Williams

This pendant and earring set makes me think of margaritas and summer flowers.  Not a hint of snow in the forecast!  After a little experimentation, I found I particularly liked the look of matte transparent and opaque beads best.  They created the most striking lines and the best foils for the sequin embellishments.

But what if I wanted a necklace to cool off in the summer heat?  To answer that question, I started playing with turquoisy blues and bright greens, with lime sneaking into the color palettes every time I looked away.

Summer beaded Snowflake Mandalas in turquoise, teal, black and lime green.  Pendant with sea glass ring by artist Karen Williams


The colors reminded me of a dress I purchased last summer.  Thinking it would be fun to make a necklace to match, I began playing with more stars.  The dress, by Desigual, has an asymmetric design across the front, which I hope to echo in my design as well.  Right now, all I have are component parts, which I thought I'd lost for most of the past month.  Luckily, they turned up this morning while looking for something else.  Yeah!  (Especially since I couldn't even find the pictures I'd taken before!)
  
Not completely sure where I'm going yet!
With the largest component, I'm going for a field of stars effect.  Not quite sure if I like the crystal interstitials or not.   They're supposed to take the place of the white polka-dots from the dress's design.  Adding white to the necklace seemed like simply too much.

 It's such fun swapping out the colors to see where things end up.  I first did this a few years back with my Halloween Snowflakes, complete with little lampworked bats to finish off the earrings.  Doing some inventory, I found I have exactly of those two kits still available, and have relisted them on Etsy. 

So there are my summer experiments!  How about you? Any crazy color experiments this season?


Wednesday, August 19, 2015

Registration is now open for Fall Classes at Fusion Beads

Registration for Fall Classes at Fusion Beads opens today!  They offer an incredible selection of classes in bead weaving, pearl knotting, wire working, chainmaille and metal working, resin, fusing, PMC and more.  Their Fall catalog features seventeen pages of workshop goodness, with over eighty scheduled workshops.

I’ll admit, I’m tempted to take one of Sarah Thompson’s wire weaving classes.  Her Embrace Ring is featured at the bottom right of the  cover page.  It’s a technique that I’ve been curious about, and a class is a quick and easy way to give it a try. 

This fall, I’ll be teaching four classes between from October to just before Christmas.  Kicking off the semester with my Freeform Peyote Rings.


Freeform Peyote Rings
Sunday, October 11, 2015 from 2:00 - 5:00pm
If you’ve never tried freeform peyote stitch, this is a great place to start!   

Freeform Peyote Ruffles
Saturday, November 7 from 11:00 - 5:00pm
Ready to move on to more advanced bead weaving techniques? 

Lantern Ornament Beaded Beads
Sunday, November 15 from 2:00-5:00pm
With the holidays coming up, these elegant beaded beads make great ornaments, gift toppers, or hostess gifts.  They can also be worn as unique pendants or incorporated into other jewelry designs.

Snowflakes and Stars
Sunday, December 20th, 2:00-5:00pm
Need a beading break from the holiday madness? Come join me for an afternoon of laid back holiday cheer as we make a variety of beaded snowflakes and stars. 

Thursday, August 13, 2015

Meet Spike and Pete, Creative Block Busters Extraordinare!

Spike, happily swimming through a 'rock stream' in my garden
You might have already caught a peak of Spike in my earlier post for the Time to Stitch challenge about bead embroidery.  Both he and his younger brother Peter (Pete for short) made their official debut in the Summer issue of Creative Spark magazine produced by Znetshows.com.


 Besides being incredibly fun to stitch, these Happy Fish turned out to be the antidote to a months-long episode of creative block.  After finishing Explorations in Freeform Peyote Beading, I'd promised myself time for personal exploration, where I could play with any design or beading ideas my heart desired.  This included signing up for Robin Atkin's Bead Journal project at the end of last year. 

Fast forward to April, and I still hadn't beaded anything significant, nor made a single bead journal entry.  Aack!  Yes, it had taken significantly longer than anticipated to finish the rewrite/reformatting for the digital versions of Explorations, but that still left several months of creative wasteland.  Looking back, part of the problem was while I said I wanted to 'play', I felt like I should work on a series of large, extremely challenging sculptural pieces.  My creativity simply doesn't work that way.  Not for me. 

Spike, sans sea glass.  Poor Spike!  He's underdressed.

For me, if I promise my creative self play time, then I assign it work, I have a rebellion on my hands.  All of my best work seems to come from little seeds, from saying 'let's just' or 'what if' and from not being too invested in the initial outcome.  Sometimes I forget this personal truth!

Then something like my Happy Fish comes along to remind me.  By the time I settled in to make a piece for Christine and Therese's challenge, I didn't have enough time to make a 'fancy project'.  Combine that with my love for Georgia McMillan's Happy People, and a desire to use sequins a la Sarah of Saturday Sequins, and Gilbert, by first Happy Fish was born. 

Pete shows off his 'plumage'.  Fused glass cabochon by JJ Jacobs
 He was so much fun, I immediately started in on a second fish - this time I wanted to use these really cool stone spike beads I'd picked up last year, but hadn't found a use for yet.  When Hope invited me to participate in the Summer,  sea glass issue for Creative Spark, saying Yes! was a no brainer.  My fish NEEDED sea glass for their tails.  They told me so, really, in no uncertain terms.  They explained that no self-respecting fish would let itself appear in public without their lovely sea glass tails!  (Sorry Gilly) 

And while all this silliness played through my head, I was off and beading again.  Meanwhile, as I worked on the fish, ideas for other projects began appearing, almost as if someone had finally managed to turn the handle of a long-rusted tap.   I've even started work on the first in my new sculptural series. 

Let's hear it for the power of play! 

I'm about ready to start on a new Hapy Fish.  This one is going to have flowers.  Normally, my garden is in full bloom this time of year, but because it's been so hot here in Seattle this summer everything bloomed early, and my poor garden is looking a bit bedraggled. No flowers in my garden?  Well then I'll decorate my fish with flowers!  Even fish would like flowers, right? So why not?